

Building, Growing, Evolving – New Studio Shelves!
/
By Canne Holladay

Base frame of the Shelving Unit (Step #2)
For those of you who have been keeping up with us over the past few months you know that we’ve been making some updates around the studio. We’ve done some rearranging, and a mega rebranding. In the spirit of the new year we wanted to share with you some information for sprucing up your space. For many of us, having a clean and organized work space is vital to our productivity. At Rat City Studios we like shelves and peg boards. One of our latest additions has been the construction of four new studio shelving units. The design for which, created by our favorite Rickie Barnett, we’d love to share with you.
This unit makes great storage and its adjustable shelves make it easy to size a space to the needs of your work. Because the shelves are removable they could even be used as ware boards, transported straight from the wheel into the unit. If you need to divide a room the back of the shelf can be used as a faux wall. We even added a sheet of drywall to the back of one of ours to double as a photo backdrop and notification wall. We hope you enjoy these as much as we do, and here’s to getting organized!

Canne Holladay building (Step #5)
Building Materials:
3 - 4’x 8’ sheets of half inch OSB Board - $30
3 – 8’ lengths of 2” x 4” boards - $8
2 – 8’ length of 2” x 2” boards - $5
7 – 8’ lengths of 1” x 2” boards - $10
1 – 4’ x 8’ sheet of high quality plywood - $20
(removable shelves with in)
1lb. - 2 ½” wood screws - $9
Brad Nails -$7
Wood glue - $5
60 or 80 grit Sand paper - $5
1 Gal. Polar White, 94416343871 Behr Glossy Exterior Paint - $33
Roller for painting/ paint tray/ 2” brush - $10
( In Total ~ About $140, if you have all the tools… )
Needed Tools* :
Circular Saw - Cutting Sheeting
Chop Saw - Cutting 1”x2” / 2” x 4”
Jig Saw - Cutting notches
Hand drill
Straight Edge/ Tape Measure
Tape measure
Speed Square/ Pencil
Pneumatic Brad Nailer
Air compressor
*These are the tools we used; you may find that other tools, like a table saw, may be easier for the job if you have access to them.

Rickie Barnett fitting the center support (Step #4)

Rickie Barnett building (Step #7)

Rickie Barnett attaching the center frame (Step #10)

Time to add the shelf slats! (Step #12)

Painting the shelf

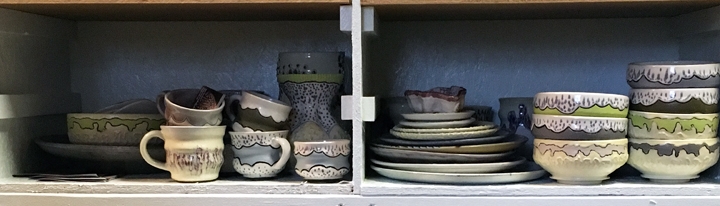
Shelf full of greenware
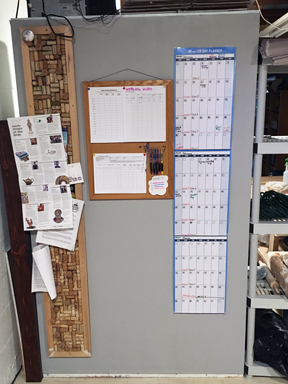
Use both sides!
Instructions:
Out of the first sheet of plywood
Make a cut across the top at 79.5”. Cut this piece, currently measuring 79.5” x 48”, into three segments each measuring 79.5”x 16”. These pieces will be the sides and center divider of your shelf. Cut a notch in the front of the center divider to fit a 2” x 4” (1.5” x 3.5”) board deep with the bottom of the notch starting at 40” from the bottom of the piece. Cut another two notches measuring at the front and back bottom of the center divider. These notches should be cut to snugly fit a section the board.
Framing the base measuring 16” x 48”
Cut two lengths of 2” x 4” measuring 48” and four lengths of 2” x 4” measuring 13”. Screw together the outer frame of the base with the long boards on the outside. Find the center of the front and back of the base frame and mark a quarter inch on either side. (Now there is a half inch space marked out at the center of the base where the shelf center divider will be supported.) Insert a 13” segment of 2” x 4” into the frame, carefully aligning it with one edge of the inside marks and screw it into the base. With the base laying on a flat surface, insert the center divider to the center of the base where the spaces were marked out. Using the shorter screws, attach the divider to the first center base support so that when the second support is added the screws will be hidden. Insert the last 13” segment of 2” x 4” into the frame, tightly sandwiching the center divider between these two supports, and screw it in place.
Attach the side pieces to the outside of the base frame with screws, so that the bottom edges are flush with the base.
Fitting the Center Support
Cut a segment of 2” x 4” board to 48”. Fit this segment into the notch cut at the front of the center divider. Attach it at the sides so that it is level with the bottom of the board at 40” from the bottom edge of the shelf.
Framing the top
Cut segments of 2” x 2” down so that there are four pieces measuring 14.5” and two pieces measuring 23.25”. Starting with the short cuts, screw these lengths to the insides of the side walls and center divider at the top of the shelf, keeping them flush with the top edge of the walls. Attach the long cuts as support between the walls, lining them up as a frame in front of the short cuts.
Flip the shelf so that the front side is on the floor
Attaching the shelf back
Out of the second sheet of plywood make a cut widthwise at 79.5” to make the back sheet of the shelf. Lay this piece across the back of the shelf and align it with all edges. Put in screws at the corners and in the middle of the top and bottom to secure in place.
Use the remainder of the second sheet of plywood (measuring 16.5” x 48”) for the top of the shelf. Secure this piece at the corners and across the front support
Stand the shelf upright.
Creating the frame for the middle support of the shelf.
Cut four lengths of 2” x 4” at 13” each, and two lengths at 23.25” each. Starting with a short length, attach each leg of the center frame to the inside of the shelf, keeping it level with the front cross support, and with the top of each board measuring at 36” from the inside roof of the shelf.
Inserting the fixed shelves
Using the remaining pieces of plywood cut four pieces measuring 16” x 23.25” for the base of the bottom and middle shelf quadrants. Screw these into the inside framing at the middle and base of the shelf.
Attaching the shelf slats!
Cut your 1” x 2” lengths down to 40 pieces that are each 15” long. Gently sand these pieces so that your hands don’t catch any splinters. Cut a scrap of 2” x 4” board down to 4” – this will be your spacing guide for attaching the slats. Place the guide upright at the base of a quadrant wall, run a line of glue across the wide side of a slat, place the slat on top of the guide gluing it to the inside wall of the shelf, level the slat. Secure the slat in place with a few staples from the staple gun. Place the guide on top of the slat and repeat steps for attaching each slat until there are five secured to each inside wall of the shelf. (There will be enough spaces to hold up to 20 shelves in this unit.)
Add some brad nails to the back and roof of the shelves to hold the thin plywood together between the screws
Cut your sheet of higher quality plywood into pieces that are 23” wide and up to 16” deep. You can get up to 12 shelf inserts at this size out of one full sheet of plywood. (A smooth surface scratches the feet of your wares less…)
Cover with a shiny paint. Keeps the wood protected from water damage!
Tips!
Measure twice, cut once
Use wood glue between joints.
Lumber is measured in whole numbers often… . But a 2” x 4” is really a 1.5” x 3.5” measurement…
Keep a straight alignment from the head and bit of the drill through the screw to make the most of the drill’s torque.
Pre-drilling through 2” x 4” extends the life of your bits. Always use a bit that is smaller than the diameter of the threads for pre-drilling
When lining up pieces for attachment it’s a good idea to check the placement, drill the screw in half way, and double check the placement.
As you’re working be sure to keep your measurements relative to your project so all of your parts fit.
When inserting the slats check your guide by attaching the bottom two slats and testing the level with shelf or scrap cut to fit the diameter of the shelf before securing all slats.
Using higher quality plywood that has a smooth finish can protect the bottom of your work from unwanted marks


