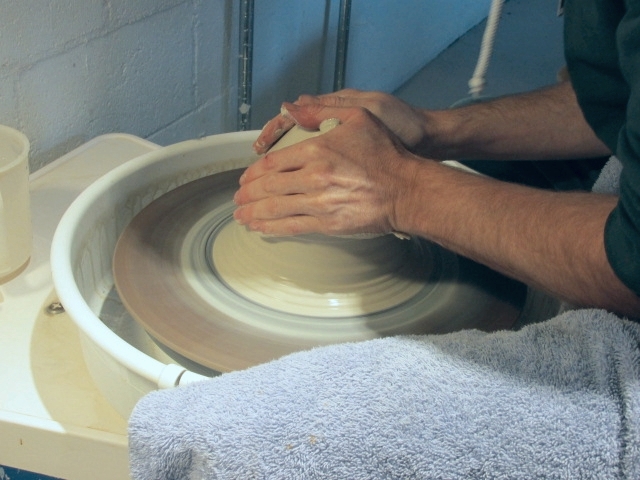
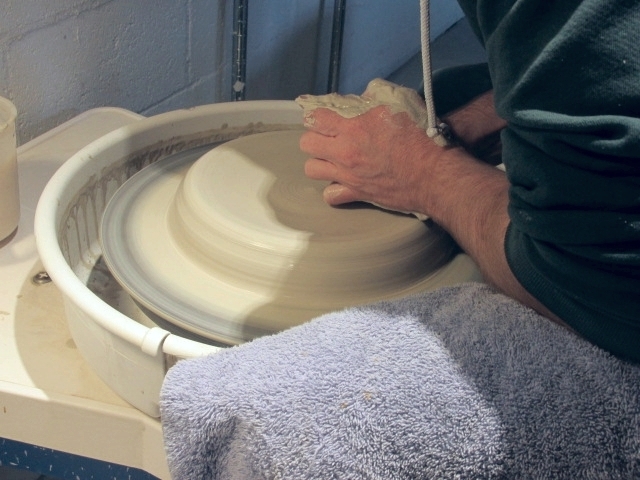
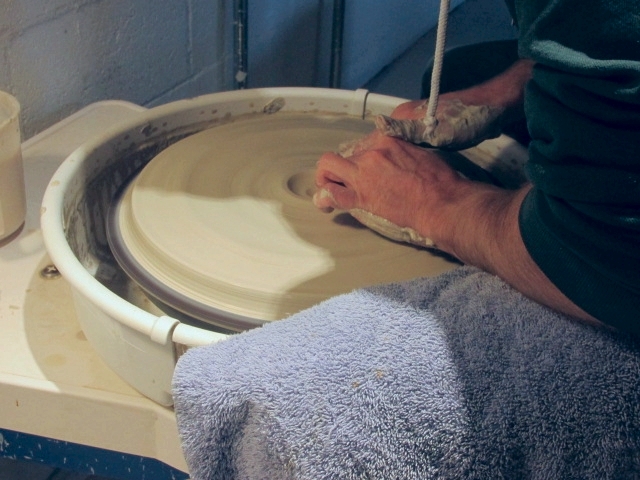
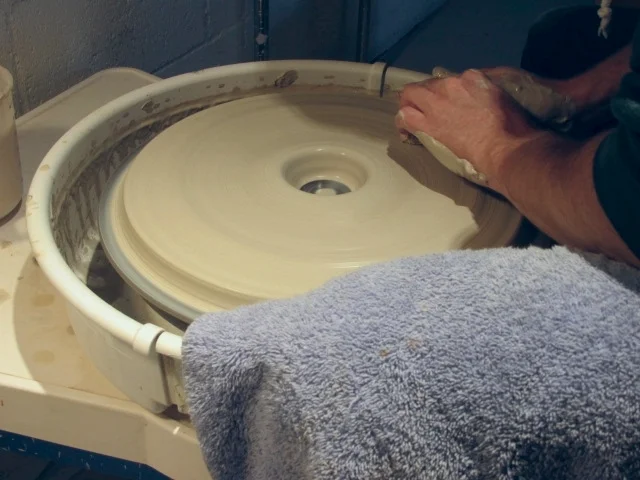
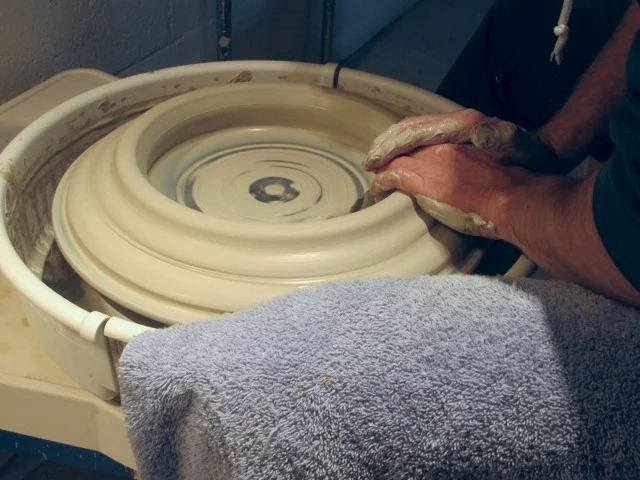
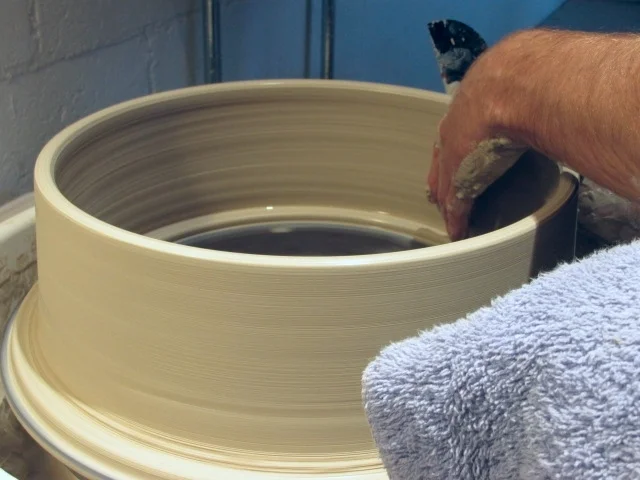
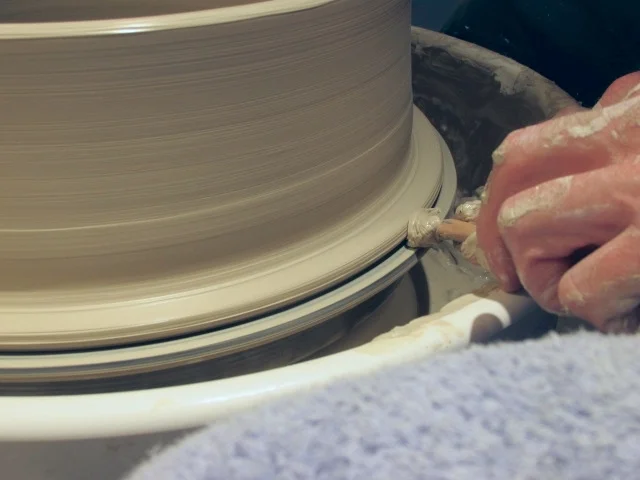
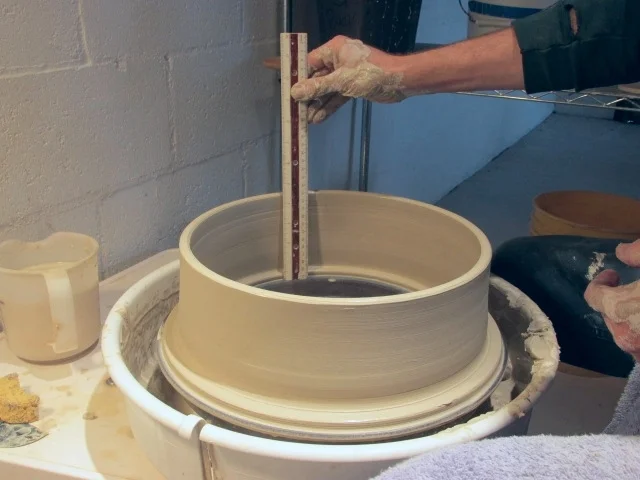
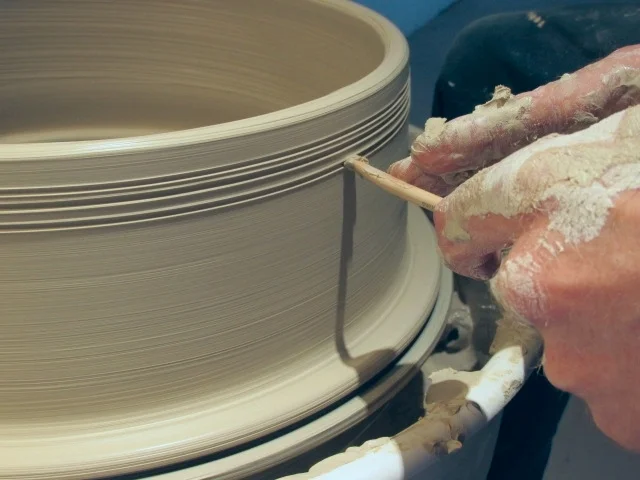
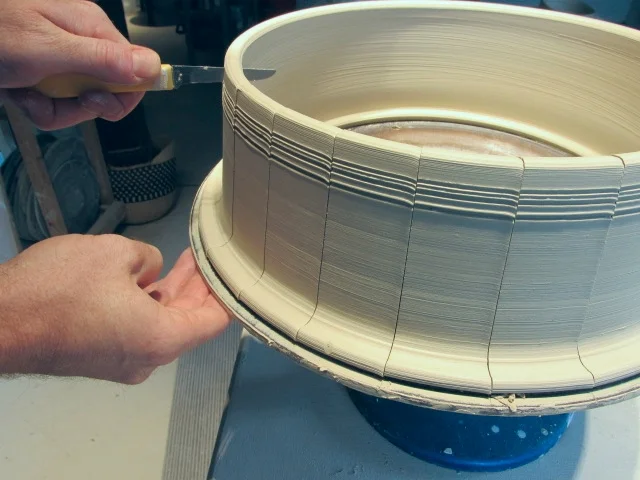
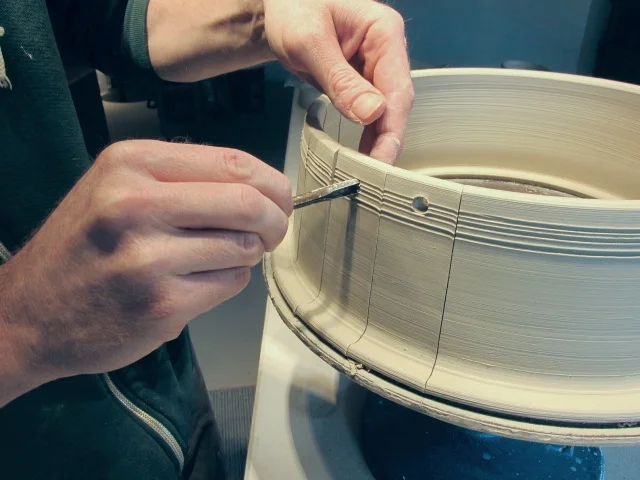
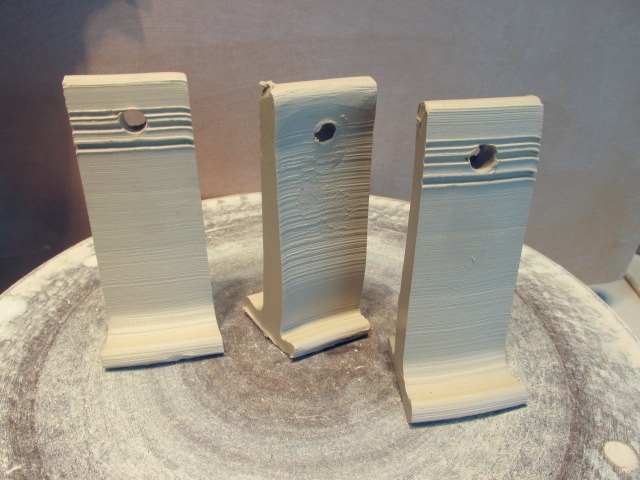
Rat City Studios
  • Home
  • Welcome
  • Our Crew Mission & Goals RCS Policies FAQ
  • Participate
  • Book
  • Resources
  • Connect
  • Sign In My Account
Rat City Studios
  • Home/
  • Welcome/
  • About/
    • Our Crew
    • Mission & Goals
    • RCS Policies
    • FAQ
  • Participate/
  • Book/
  • Resources/
  • Connect/
  • Sign InMy Account
Glaze Wall Header.jpg
Rat City Studios

Making a Test Tile

Learn how to make ceramic test tiles for your glaze surface research!

Rat City Studios
  • Home/
  • Welcome/
  • About/
    • Our Crew
    • Mission & Goals
    • RCS Policies
    • FAQ
  • Participate/
  • Book/
  • Resources/
  • Connect/
  • Sign InMy Account
 

Making a Test Tile:

All the test tiles made in the Glaze Gallery are made in the fashion pictured below. 
Captions on the images describe each step in the making process.   

Some Helpful Hints
Make your test tiles using the same process you use to make your work with. This provides a more direct transfer of information/ effort from the testing to your work. With the same reasoning, it is helpful if the tiles also have the same texture as your work.

It is helpful if the tiles have a good amount of surface areas.  It is difficult to draw thorough information from tiny test tiles.
Give yourself some area to analyse, and look for variations.

Fire your tiles the same way you would your work.  This means temperature, cooling, and placement.  The glaze may react differently when it is vertical versus horizontal. Think about how you will employ the glaze and try to duplicate these variables when testing.

Wedging

Wedging

Wedging up about 6 1/2 lbs of Mac6 clay to begin.

Centering

Centering

For any work on the wheel, centering clay is the first step. For this Test tile we are using a 15" diameter bat. The clay will brought to the edge of this in the form of a bottomless cylinder

Centering

Centering

After Centering, spread the clay out flat similar to a plate. 

Opening

Opening

Spread clay to the edge of the bat and then begin to open. Open by pressing in the center toward the bat.  Try to keep it a funnel shape so you can see where you fingers are going.

Opening

Opening

Open the compressed ball of clay directly to the bat and making the ring bottomless. 

Opening and Widening the ring

Opening and Widening the ring

Starting in the center of the clay, make a funnel shape that touches down to the bat.  Slowly begin to stretch the ring to the edge of the bat, by pulling the clay toward yourself. After pulling from the center and moving the clay an inch or two, making sure to compress the wall down to the bat, so that it does not release and fly off the wheel. 

Setting up the Ring to Start Pulling Clay

Setting up the Ring to Start Pulling Clay

Leave extra clay at the base (interior and exterior) to form a foot with.  The foot will make it so the test tile can stand. Compress the rim and trim it if necessary to make it level. Begin to pull the walls. 

Pulling the wall up

Pulling the wall up

When making the first pull, remember to leave excess at the bottom for foot. Beging the pull above the excess clay by pinching and raising your hands in unison. Slow down the wheel once you start to get some height to avoid flaring the cylinder outward.  Also keep the walls vertical by pulling straight up and maybe even slightly inward.

Continue to Pull the Walls Upward

Continue to Pull the Walls Upward

Keep pulling the walls until the clay is evenly distributed. Here we were aiming to make the test tiles 4" tall.

Smooth Surface

Smooth Surface

Since my work is smooth, I chose to remove throwing lines from test tiles. If the test tile reflects your work surface, you will get results that transfer more directly to the idea/ surface you are searching for.

Make an Undercut on Foot

Make an Undercut on Foot

Be sure to add an undercut under the exterior foot. This makes it easier to wire, finishes the foot, and lifts the foot up to catch pooling glaze. 

Undercut the Inner foot

Undercut the Inner foot

Make sure to put an undercut under the inner foot. Again this gives a fresh ending to the foot and makes it easier to wire the test tiles off the bat. 

Measure for Consistency

Measure for Consistency

Measure test tiles for height consistency. It makes hanging them in a grid much easier. 

Add Texture

Add Texture

Adding texture gives a place for the glaze to break or show variation it would have on an edge.  I chose to add lines of texture to the top of the ring. You could stamp, sprig or carve.  Choose one texture that reflects your work. 

Cut Ring Off of the Bat

Cut Ring Off of the Bat

Make sure to cut off the ring before it firms up.
Use a wire cut off tool. Brace your thumbs on the edge of the bat and pull wire under clay, releasing it from the bat

Cut Sections from Ring

Cut Sections from Ring

The larger the test tile is the more information it will be able to show.  And it may help to imagine it on your work if it has more surface area.

Cut a Hole to Hang Tile By

Cut a Hole to Hang Tile By

If you want to hang the tiles on the wall, one simple way to do this is by punching a hole consistently in each tile.

Individual Test Tiles

Individual Test Tiles

After cutting sections and punching the hole, remove from bat.  I sponge off the sharpe edges lightly and bisque fire to c/06.

1 2 3 4 5 6 7 8 9 10 11 12 13 14 15 16 17 18
Previous Next
Wedging
Centering
Centering
Opening
Opening
Opening and Widening the ring
Setting up the Ring to Start Pulling Clay
Pulling the wall up
Continue to Pull the Walls Upward
Smooth Surface
Make an Undercut on Foot
Undercut the Inner foot
Measure for Consistency
Add Texture
Cut Ring Off of the Bat
Cut Sections from Ring
Cut a Hole to Hang Tile By
Individual Test Tiles
  • Home/
  • Welcome/
  • About/
    • Our Crew
    • Mission & Goals
    • RCS Policies
    • FAQ
  • Participate/
  • Book/
  • Resources/
  • Connect/
  • Sign InMy Account

Rat City Studios

Rat City Studios is an open creative clay studio that provides a supportive environment for makers working independently in clay and artists who seek to take the next step down their paths as potters. We support artists at many levels through experiential learning and shared experience.

Learn about our sister studio, Rain City Clay, for clay classes and group learning.

Creative Pottery:  Publish Date - June 2020

Creative Pottery:
Publish Date - June 2020

Interview: Episode 356 with Ben Carter

Interview: Episode 356 with Ben Carter

Artist of the Year Award Article (Link…)

Artist of the Year Award Article (Link…)

Rat City Studios, where we live, work, garden, and make pottery is on the traditional land of the first people of Seattle,
The Duwamish People, past and present. We are long term-visitors and honor with gratitude the land itself and the Duwamish Tribe.