

Painting with Underglazes
/By Anika Major
Website: http://www.anikamajor.com
Instagram: anikamajor
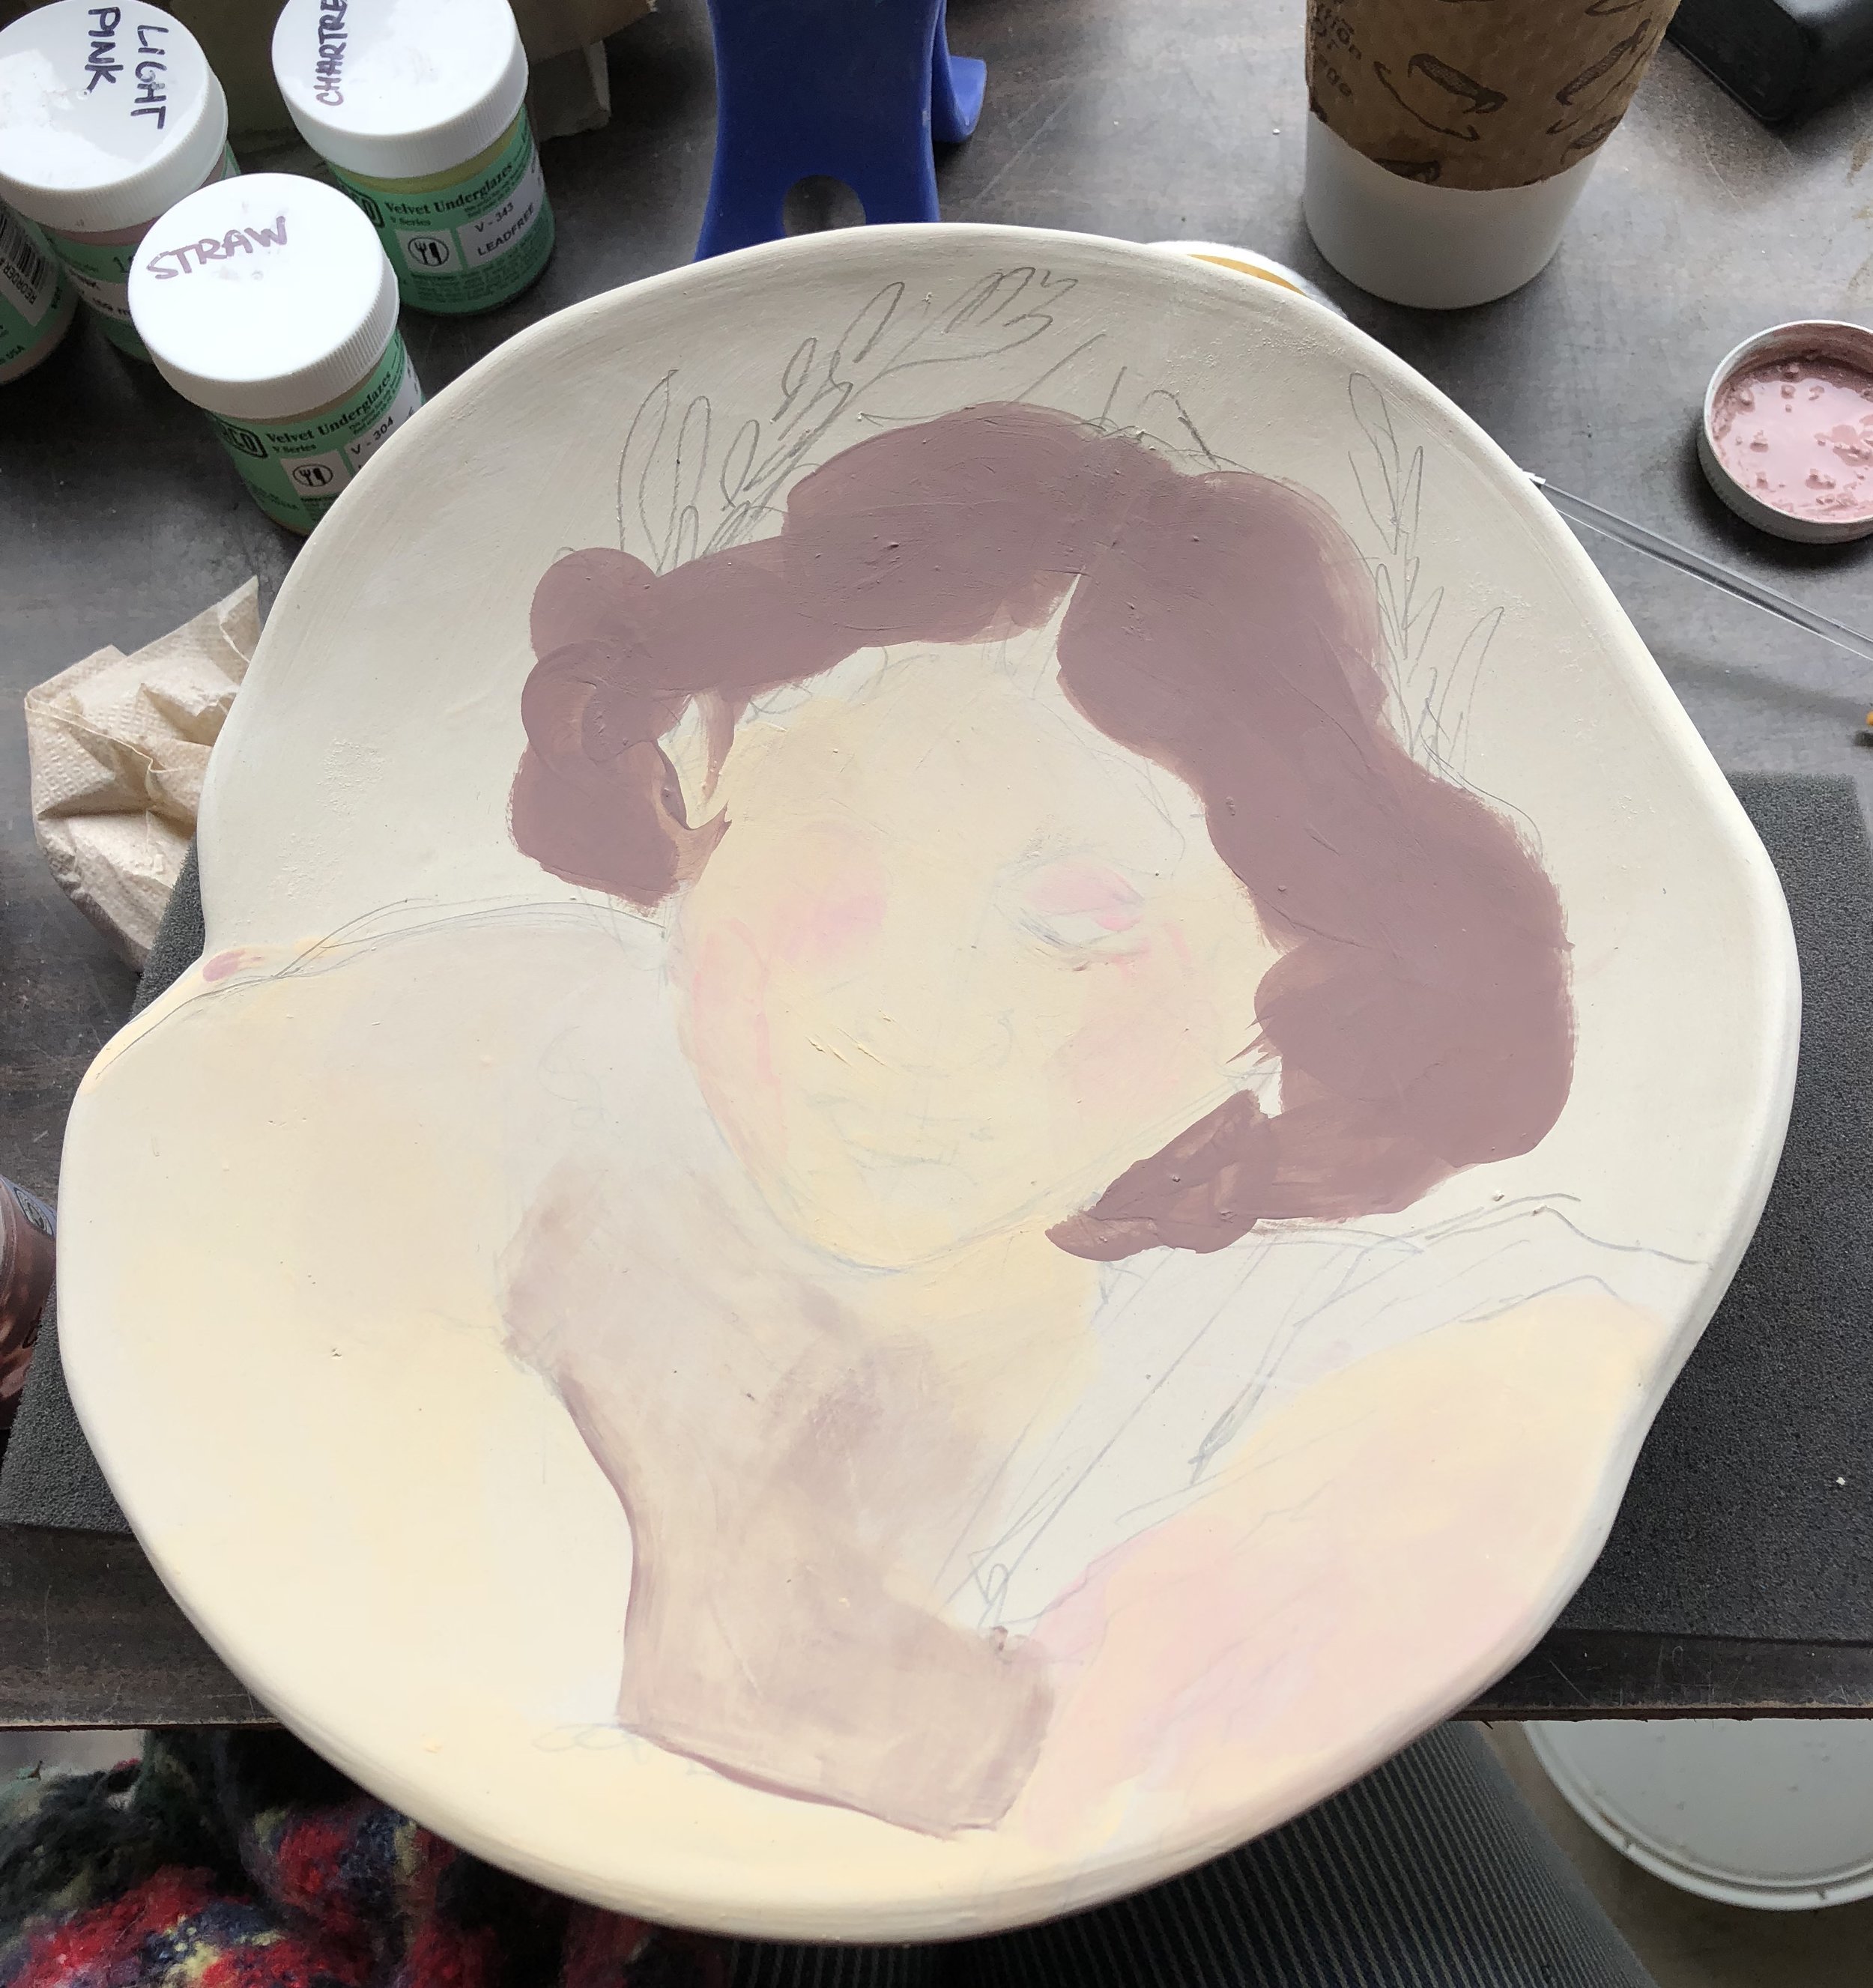
Portrait plate in progress using amaco underglazes over graphite guidelines.
Underglaze can be used to create an endless variety of effects on your surface. Using layers of underglazes you can turn your clay into a canvas, creating painterly effects to rival the old masters if you have the patience! Start with a sketch on your form using a regular HB or 2HB graphite pencil, which can be painted over with underglaze and will burn out in the bisque firing. I paint figuratively so it’s helpful to have some guidelines to start, but it’s also useful for patterns or even just to plan out the surface.
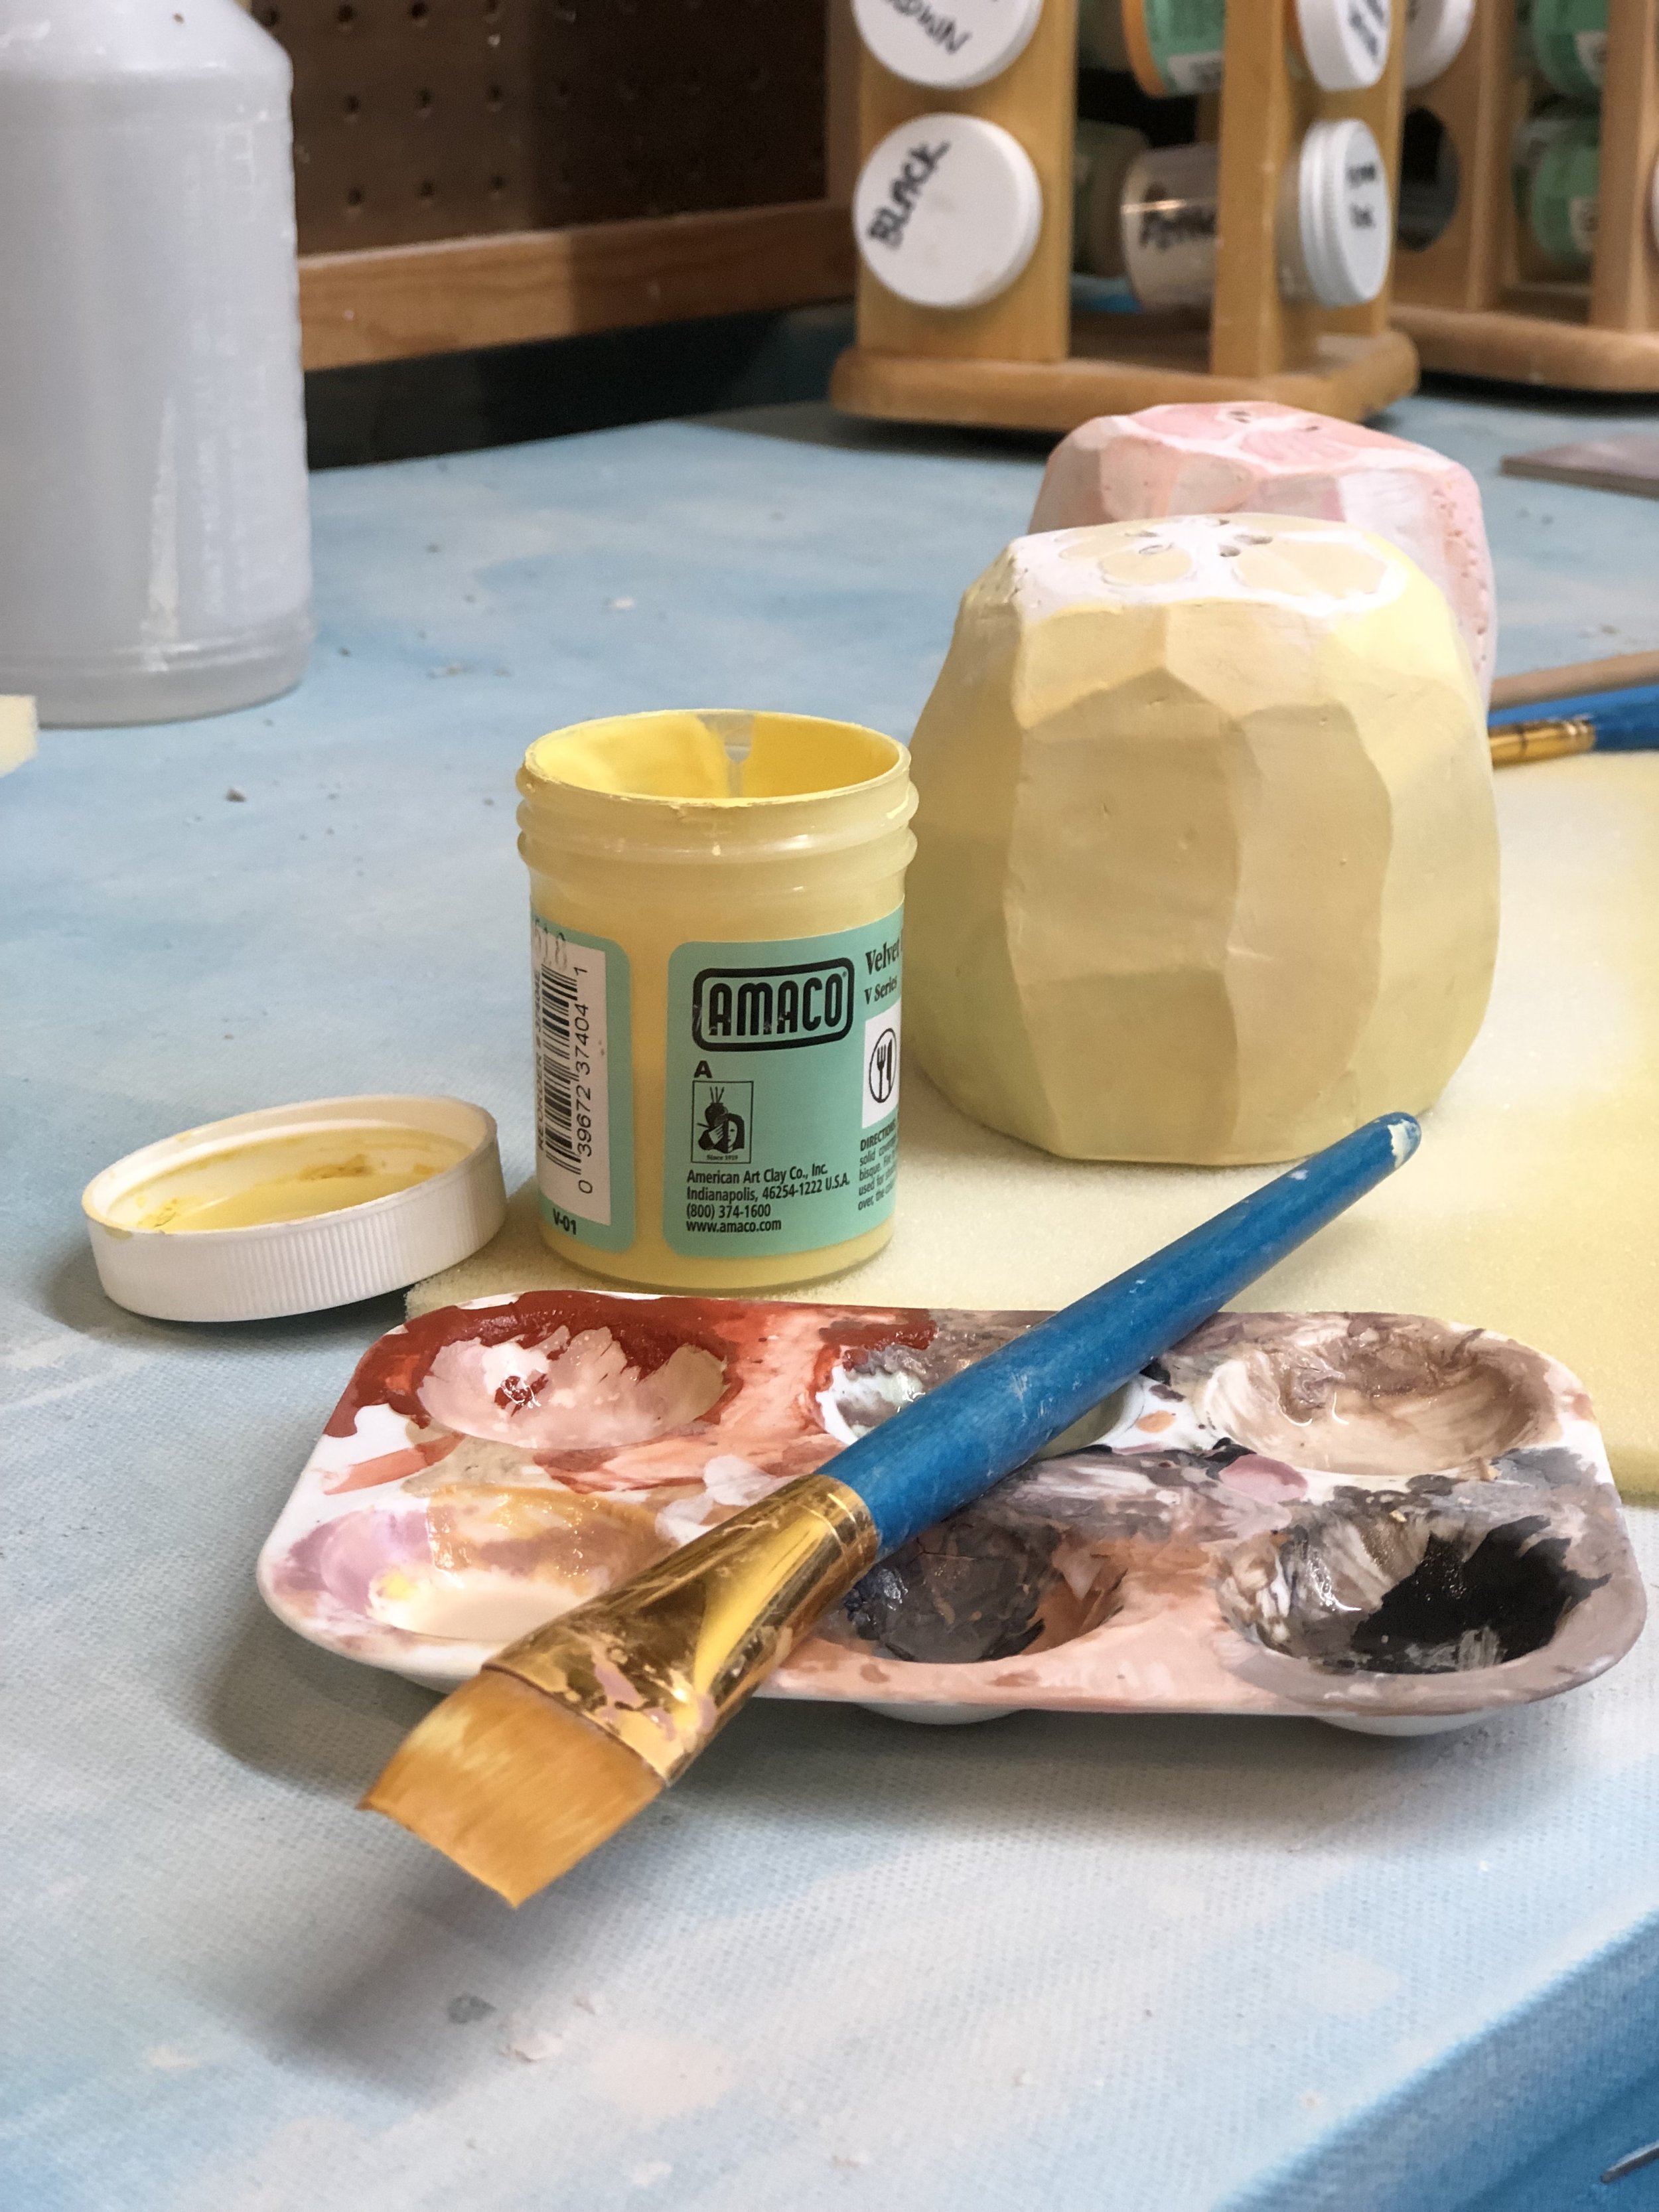
Salt and pepper shakers in progress, using AMACO V-308 Yellow Underglaze.
Underglaze can be applied at any point in the firing process before glaze (green and bisque), but for the actual process of painting, I find it goes on best at bone dry. It dries quickly, allows for easy layering, and can still be wiped or scratched away if a mistake is made. A solid base layer of 2-3 coats of underglaze is important for the color to appear without streaking, but once you’ve got that down, you can use introduce water into the mix and start thinning down your underglaze to create washes. A wash is a painting technique using a diluted ink or paint to create a semi-transparent layer of color; using this technique and keeping in mind the basic rules of underglaze, you can paint pretty much anything. If you have any form of previous painting experience, especially watercolor or acrylic, you can treat the surface similarly as you would a canvas, keeping in mind some of the colors won’t be as brilliant until fully fired. In this case, you will water down the underglaze until it is at your desired thickness, and the more layers you add the more opaque the color will be. This can be combined with sgraffito to scratch lines into the clay or other surface techniques likes mishima or lithography.
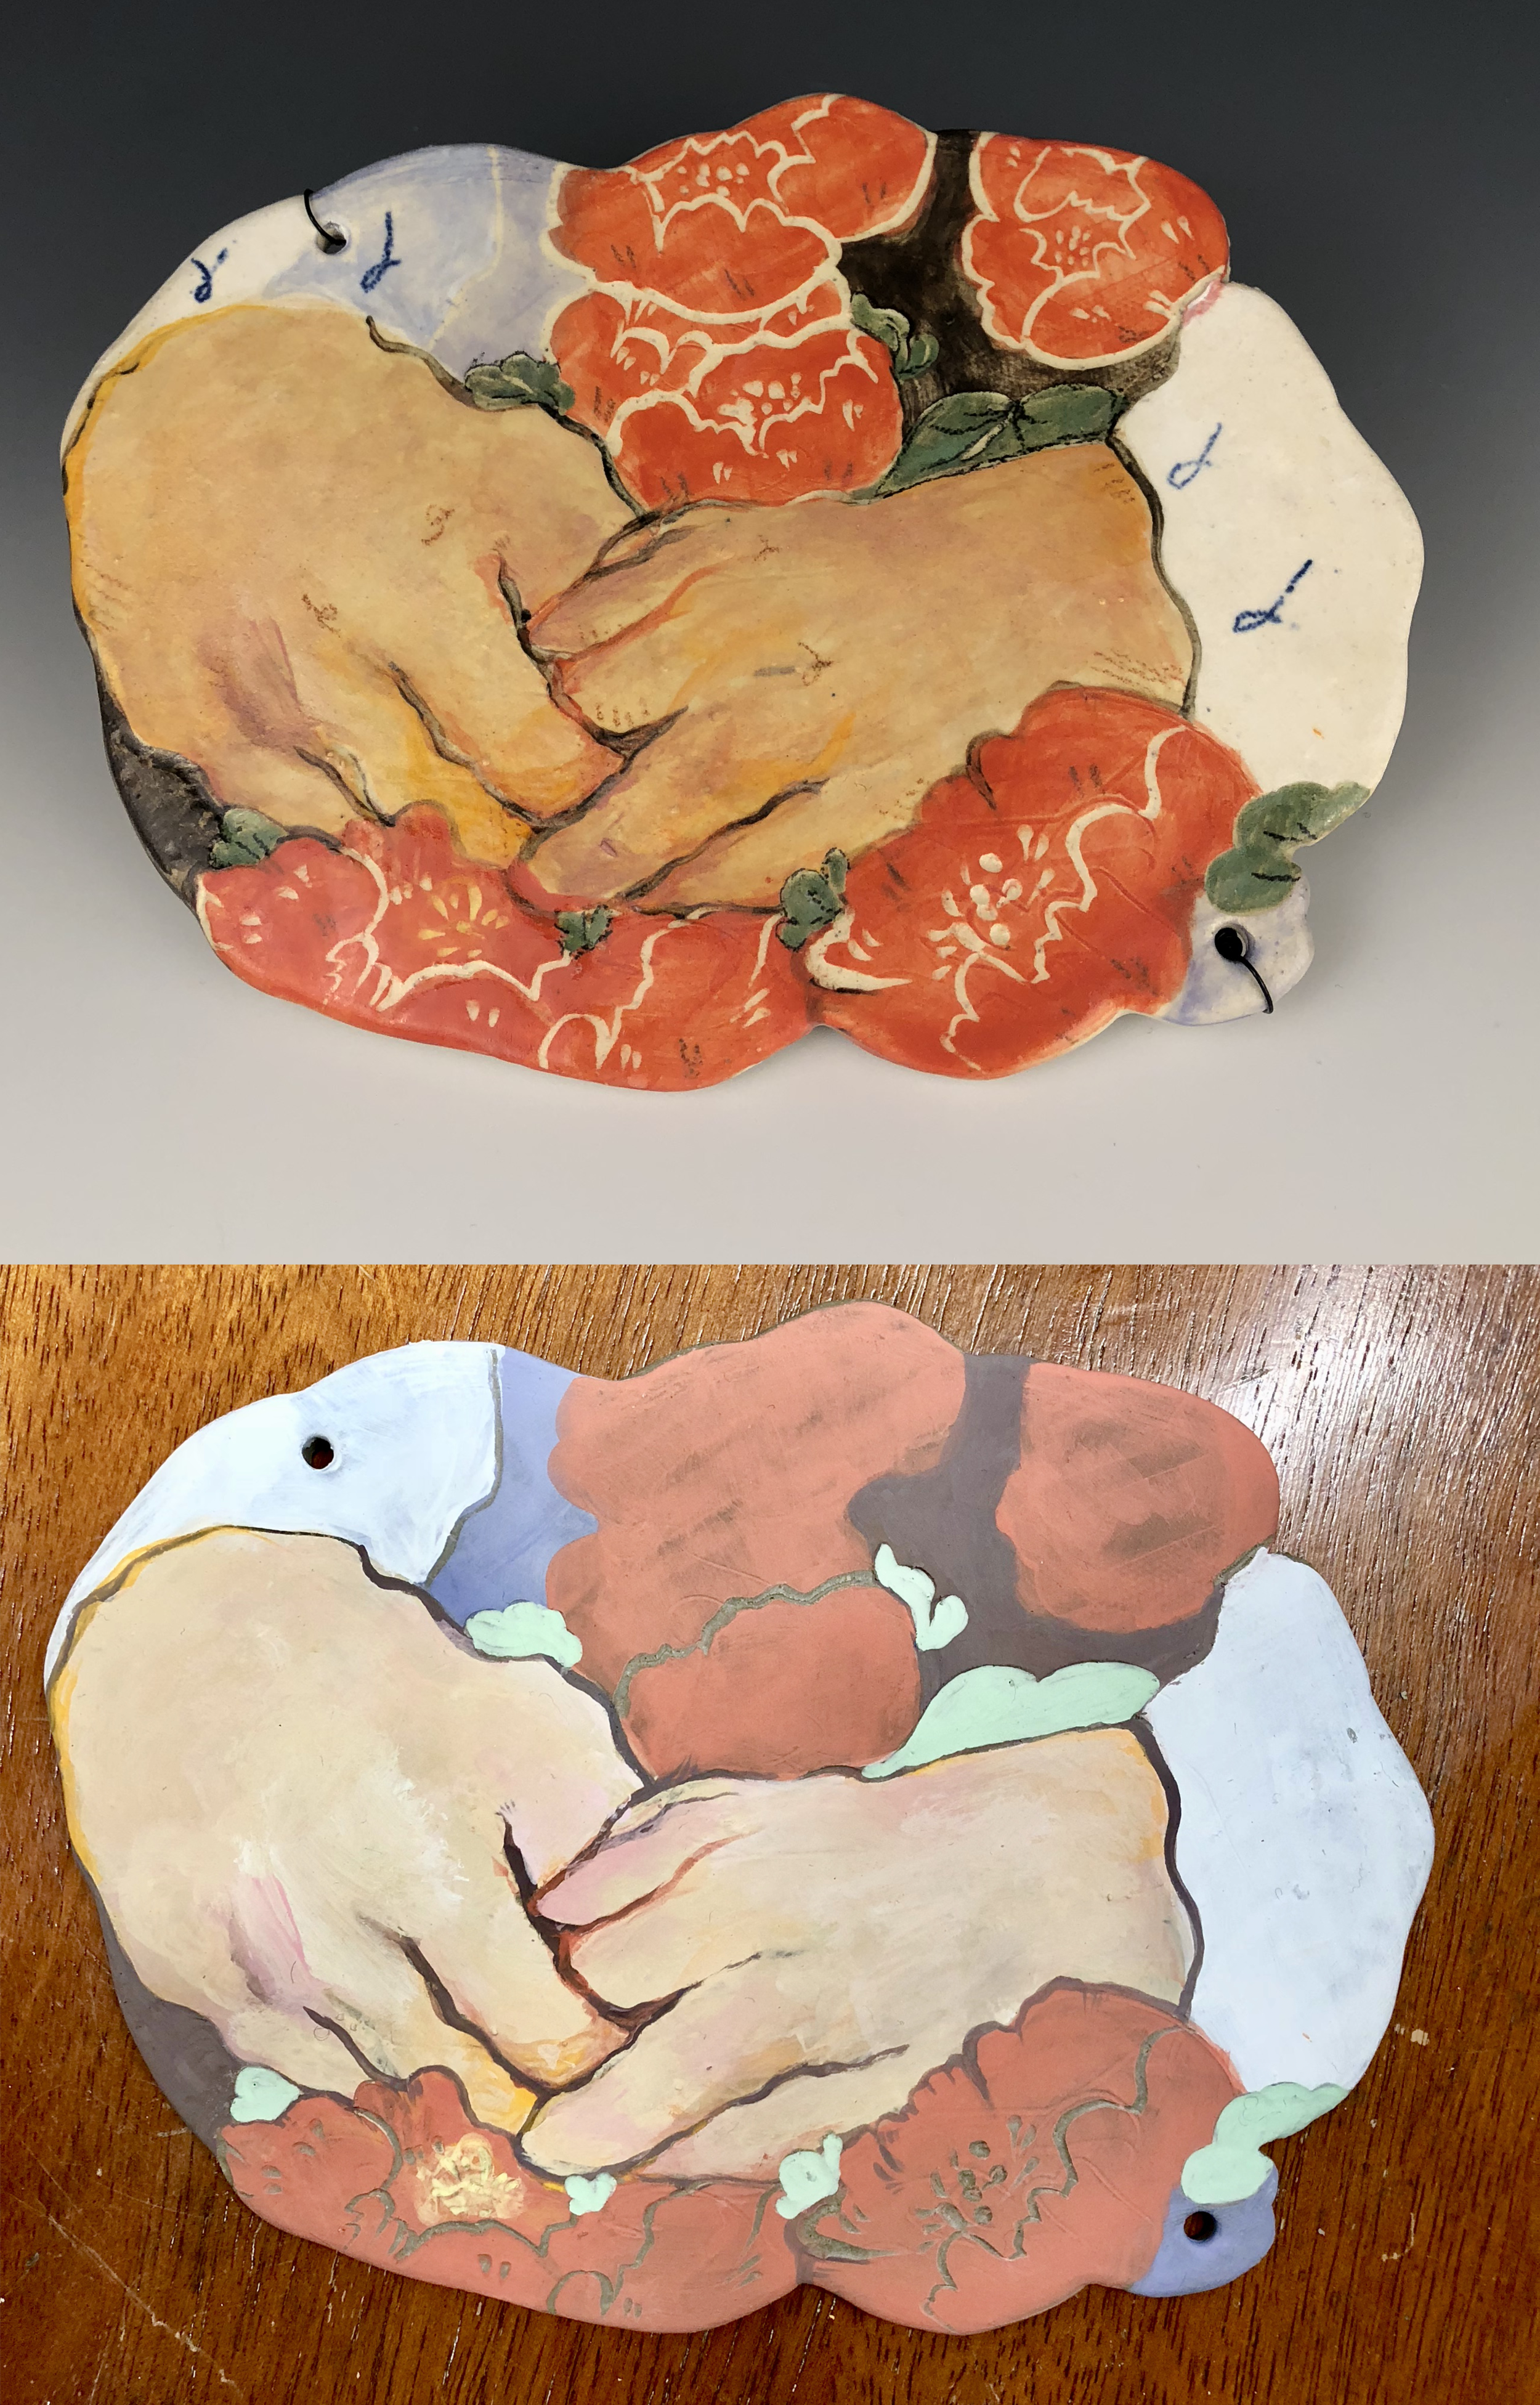
Hands, stoneware, ∆5, 2018. Fired (top) and unfired (bottom).
Painting on clay is a slow process. Once your piece has been bisqued, you can no longer wipe away colors or scratch into it, but you can still add more underglaze on top. If you’re working on a particularly ambitious painting, you can bisque a piece to ‘seal’ the progress until you’re ready to glaze, even multiple times if needed. Underglaze pencils can only be added at bisque as well; try experimenting with wet vs. dry pencil lines! If you try to use an underglaze pencil on top of underglaze that has been applied at bisque, it will not go on as smoothy and has the tendency to flake away the paint.
I’m a big fan of the color pink. I use it all the time in my work and personal aesthetics, and it’s a huge defining feature in my work next to painting. After working with underglazes for a while, I was frustrated to find that I was losing some of the pinks and other warm toned colors entirely after a glaze firing. Although the labels on the underglaze bottle may say it fires to X temperature/cone, it’s always in your best interest to do a small test tile first. This is especially discouraging when working with skin tones, and having them completely disappear with 8-15 hours of painting work on them! After several unsuccessful tests, I was getting extremely frustrated, and tried lowering my temperature and firing to ∆5.
The difference between ∆5 and ∆6 is really only 30-50˚F depending on your ramp rate. It was surprisingly successful changing my temperature from ∆6 to ∆5, and gave me more vibrant colors and even light underglaze applications were visible. My work prefers a fairly soft ∆5, so I monitor the guard cone as it’s falling to be sure it reaches the right temperature. As with anything in clay and glazing, testing is of the utmost importance; if you’re using guard cones, remember that even after you shut off the kiln your cone will continue to fall as heat/time are still exerted even though the kiln is starting its cooling process. If you’re working at ∆6 and want to try painting, begin with making a test tile of the colors you have available to you; it’s good practice to have a visible palette for when you’re making color decisions, but also to know if your colors can survive the firing. This is also applicable to underglaze pencils, which also fire to different temperatures and can be tested alongside underglazes if you’re interested in using them. Black, blue, and green will fire up to ∆10 in most cases, yellow and brown go up to ∆5, and pink only reaches ∆05. If you find your colors disappearing or feel like they’re not showing up properly, try adding more layers of the same color or lowering your temperature. Kilns of different sizes and ages fire differently - when in doubt, use a guard cone to check if you’re firing to a true ∆6 and adjust accordingly.
Happy painting!
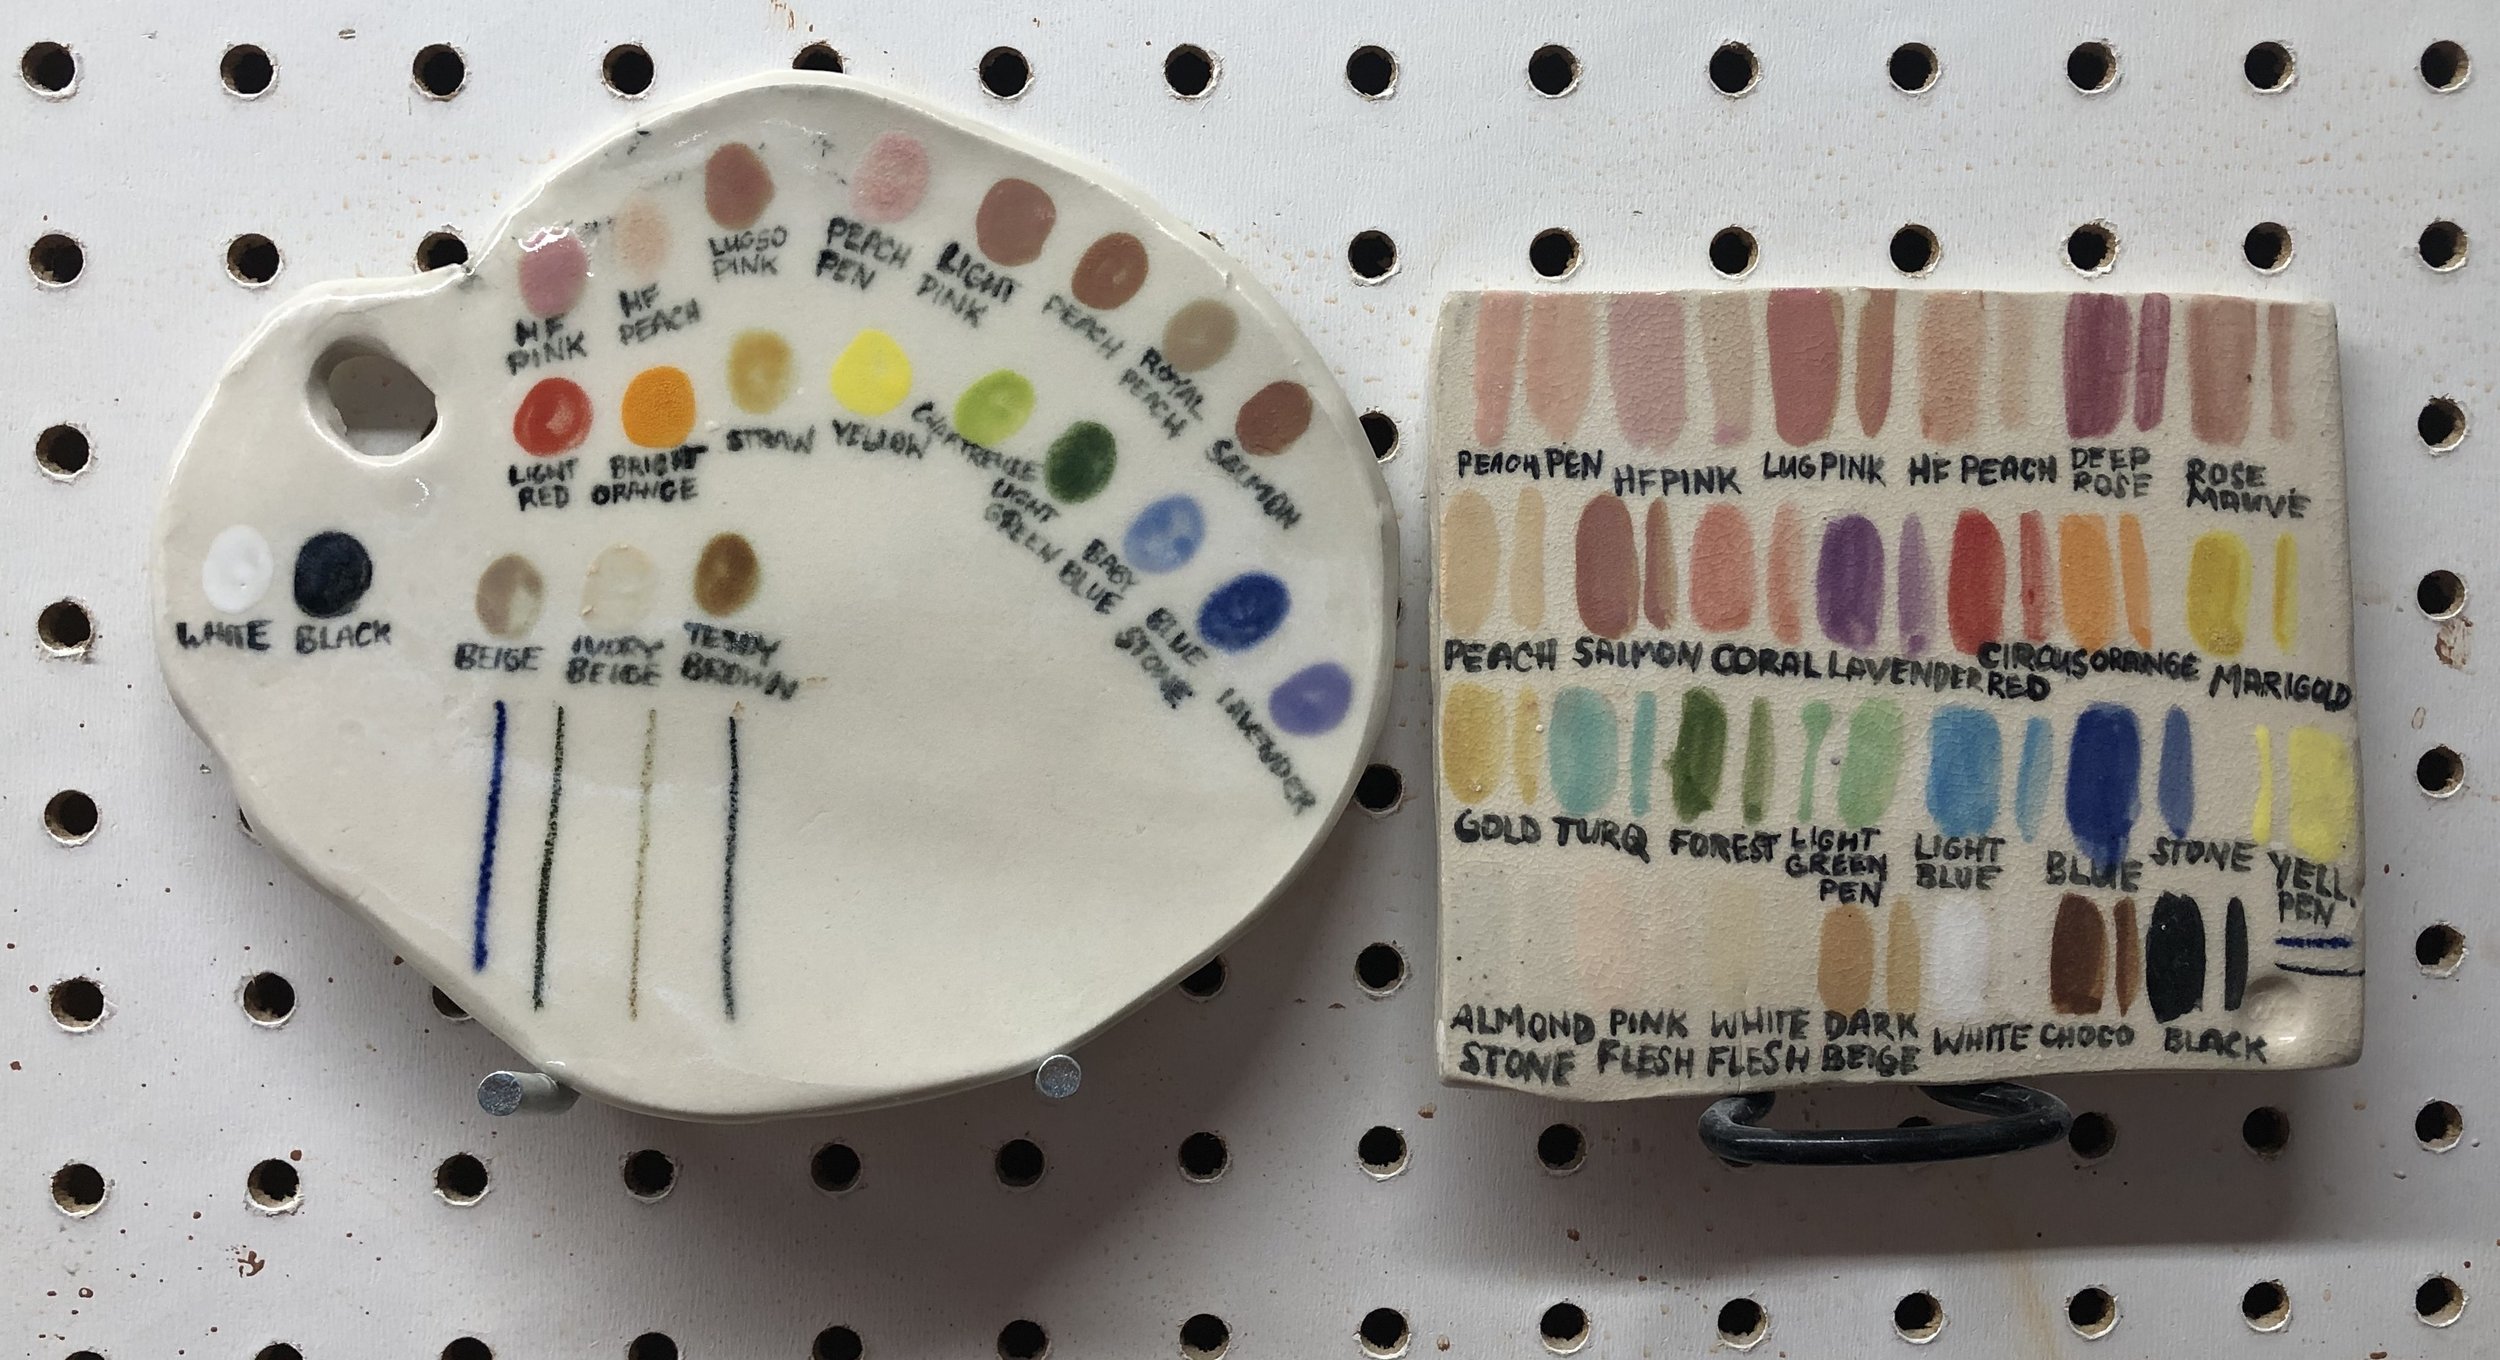
Underglaze palette tiles, porcelain (left) and stoneware (right) fired to ∆5.
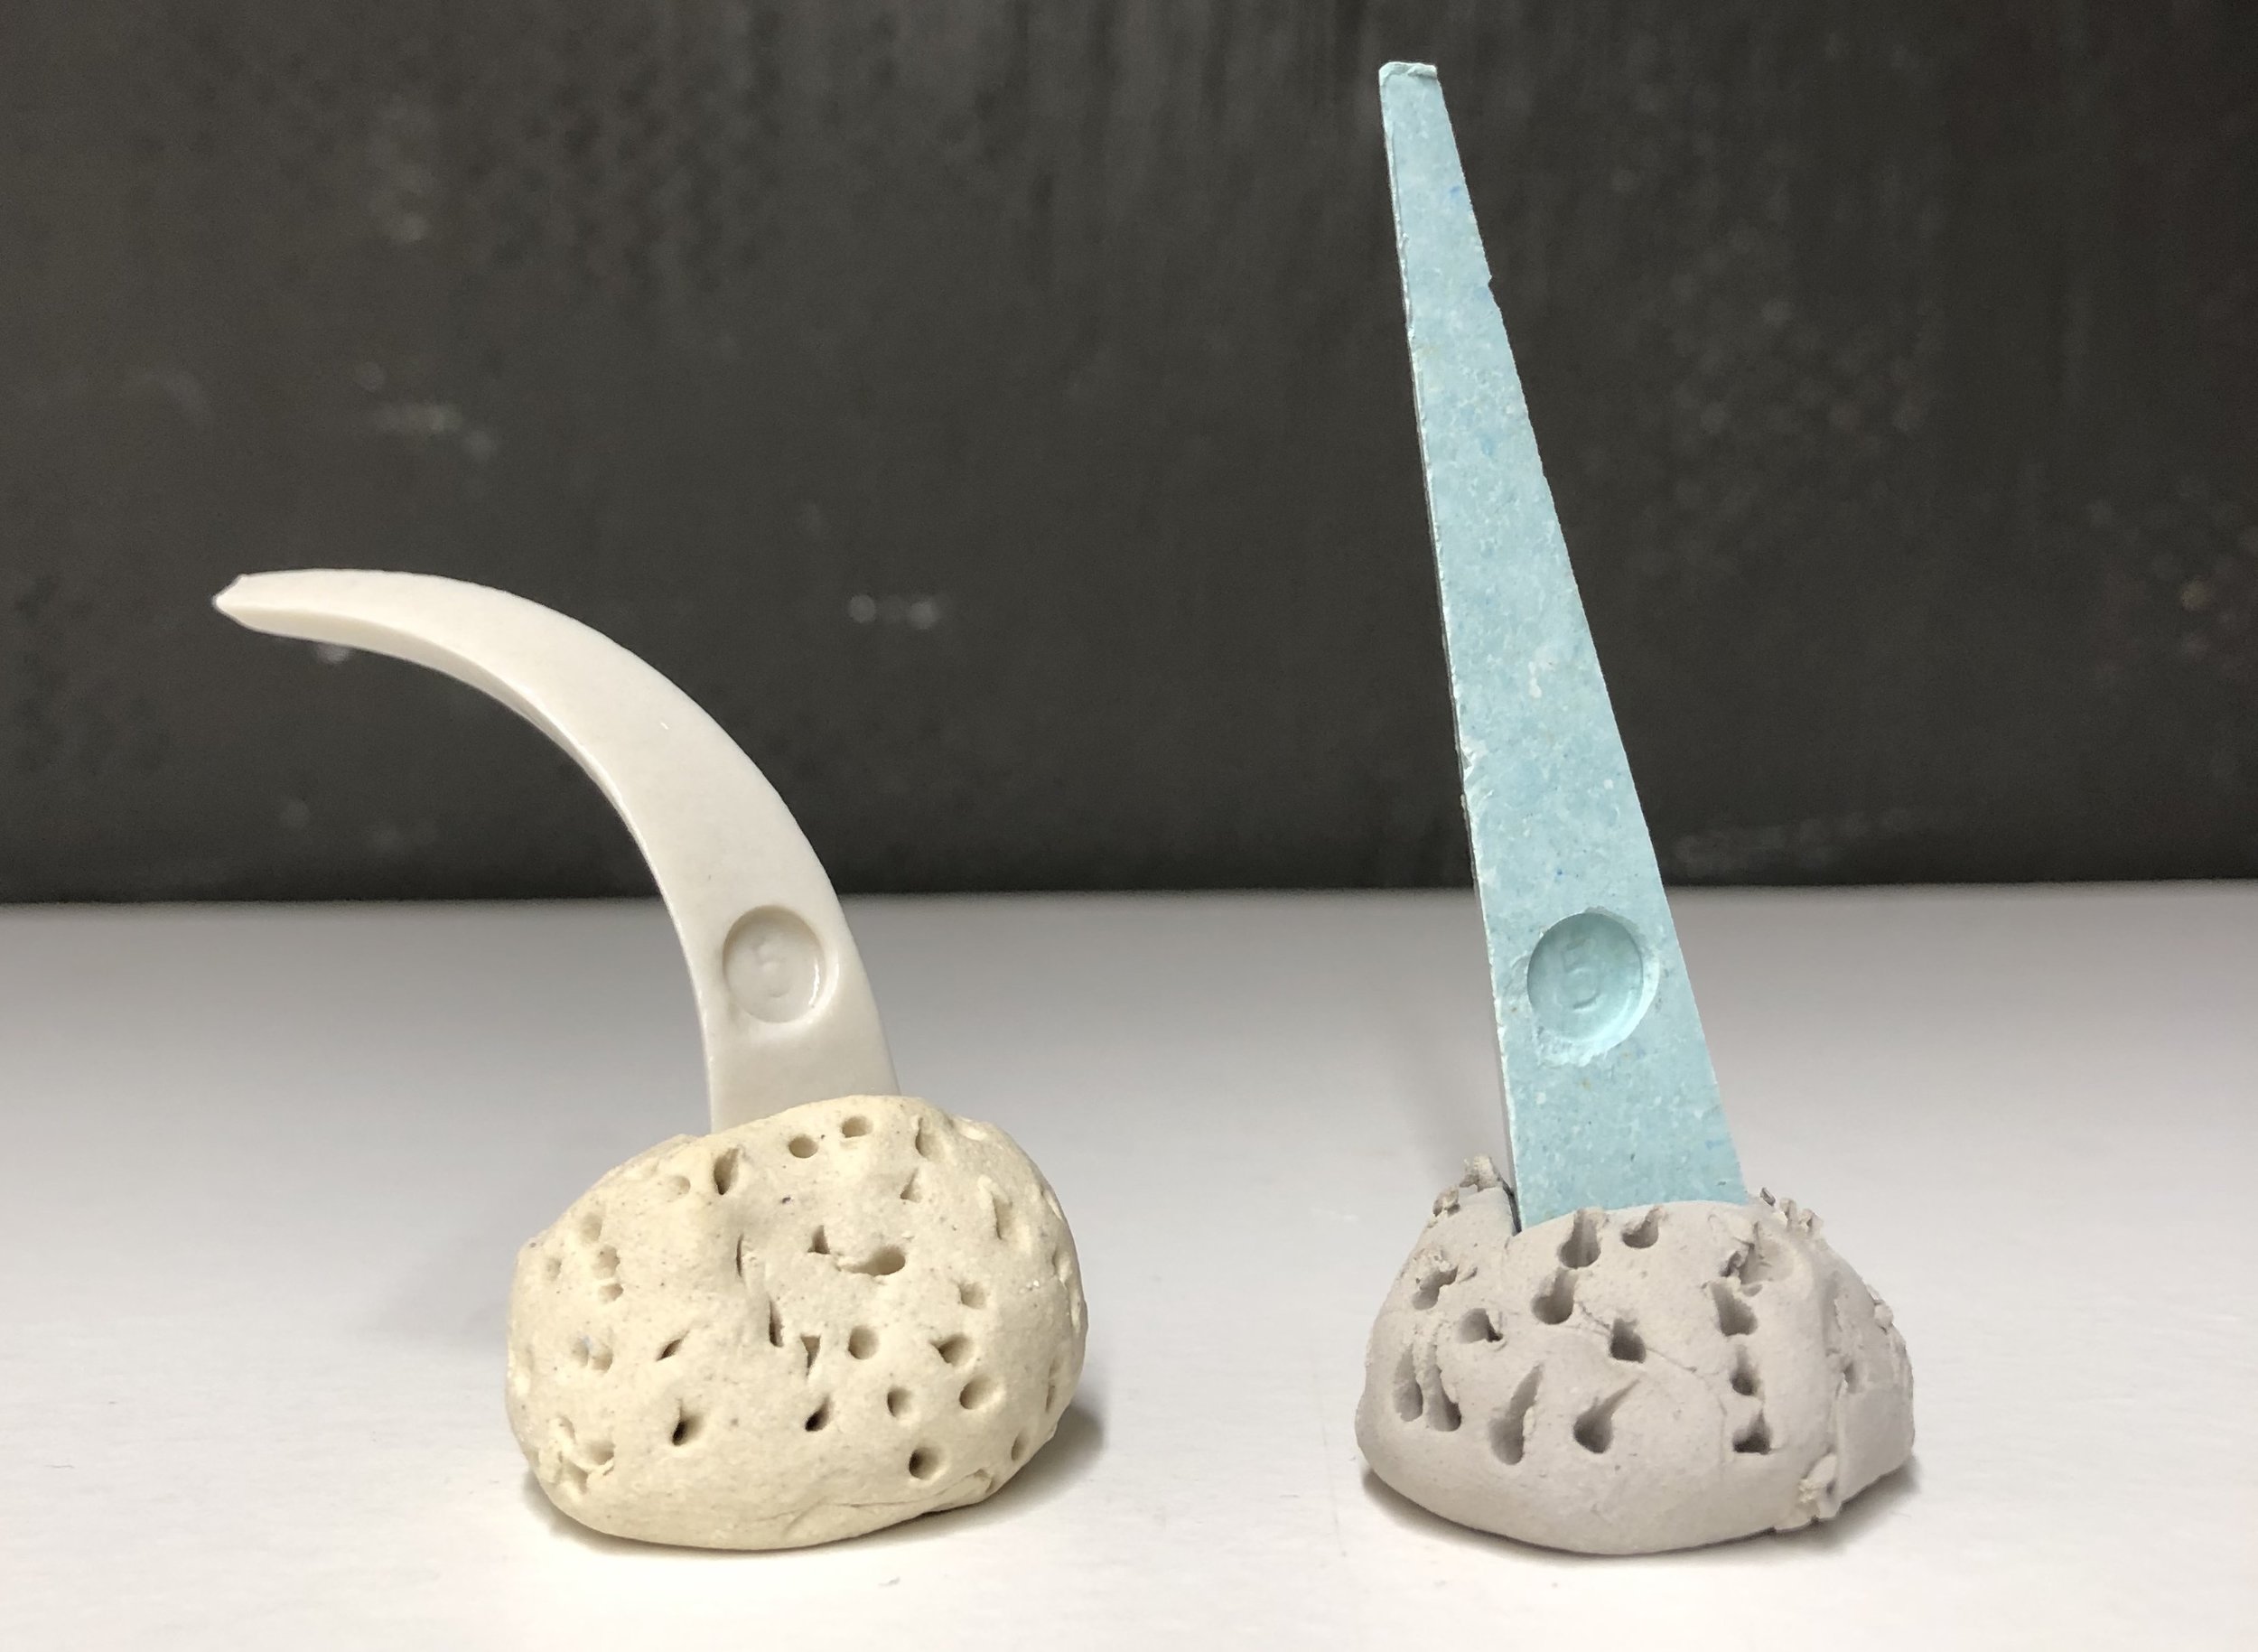
∆5 Guard Cones, fired (left) and unfired (right)


