

Turn Your Waste into Want
/Turn Your Waste into Want
By Rickie Barnett

Wedging Reclaim blend

clay for the brick mold

press the clay into the corners
Additionally, Read our shortened article in Ceramics Monthly with another set of images and descriptions. (PDF Link)
Glaze waste is an issue to contend with in every ceramics studio. What do you do with it, and how to dispose of it? These questions are always arising. Without a plan, accumulated glaze becomes quite the burden. Well, here at Rat City Studios, we have found a way to put our glaze waste to use for our benefit.
In this article we have mapped out a way to reclaim glaze waste into decorative bricks. These are used around the studio and in the garden in a variety of ways. Please enjoy our overview of how we have gone about this.
We have studio events where you can come see them in person! Check the EVENTS Tab in the navigation bar for upcoming opportunities.
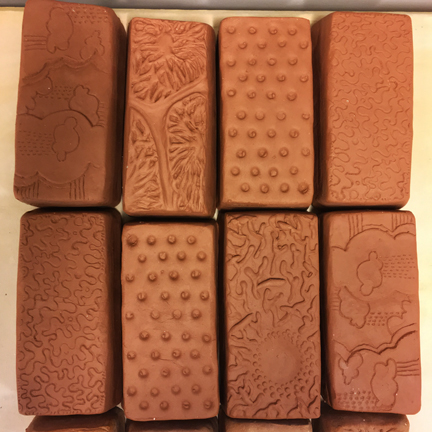
It all starts with making the original brick design to take a mold from. We took clay (this could be clay-reclaim) to make a series of different bricks (decorated in low relief textures). See figure one below as an example. Everyone here at the studio made their own version- so we have multiple designs to press out when wanted. The molds we made produce a standard size brick of of 5" x 7.5" x 2", but try out variations to see what works best for you. The original molds must be kept leather-hard in order to cast successfully in plaster. These original bricks made out of clay act as the prototype positive.
Cast your original in plaster after they reach the leather hard stage. If the brick positive is too dry it will make it harder to remove from the plaster mold. Once your plaster is set up and the clay positive is removed, you will be left with a negative, one part press mold of the brick that may be used over and over and over. At this point you are ready to start your glaze-waste reclaim extravaganza!

thoroughly press clay into mold

Brick from mold

mounded surface

dry bricks on their side

wire off clay to get a flat surface
Lots of patterns!

carve out back to help dry/ fire

Leatherhard bricks
Here at the studio we use 5 gallon buckets to accumulate our glaze waste in. We let the glaze waste settle to the bottom and skim off the clear water from the top to thicken it over time. Once the bucket is full we divide the contents in half between two buckets. We fill the remainder of the half-full buckets with dry clay (either purchased clay dry or pulverized clay reclaim) and water, just like you are mixing up a new slip-clay batch. Really the rest of this process is just like making clay reclaim. We slowly mix in dry material and a little water until we get the consistency of thick yogurt. Once the buckets are all mixed and of a good gloppy nature, we pour the glaze reclaim into plaster troughs (See figure two) to set up into a more of a usable clay material. Then we wedge up the glaze reclaim into sizes that correlate with the size of our brick molds. In our case the blocks we wedge up are just eye balled, but I’m guessing they weigh somewhere around 6 pounds. This will differ depending on your brick size but it doesn’t take long to figure out how much material you will need to have enough to press it into the mold.


3.) Glaze reclaim drying a plaster trough...
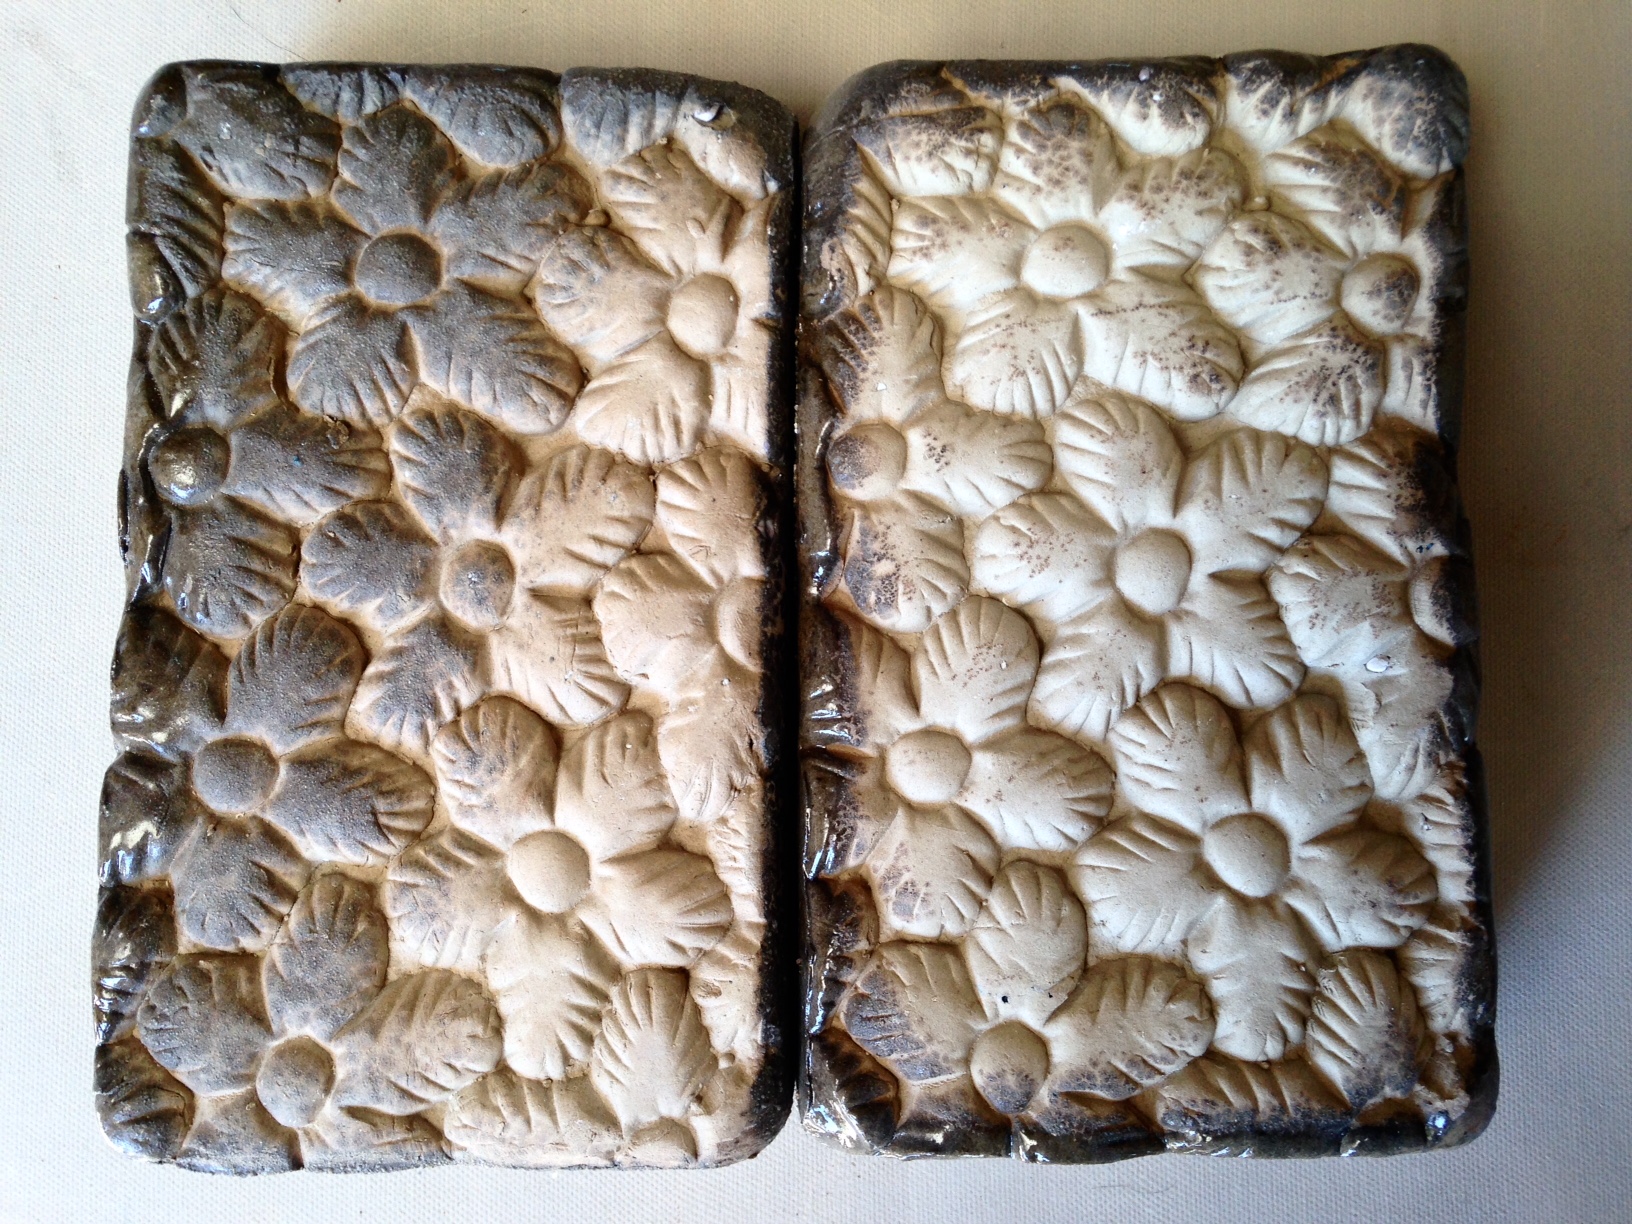
5.) Fired Glaze Reclaim Bricks!
It is important learn the melting point of the material you have come up with. Before your make a load of bricks, TEST! Make little several balls or slabs of the material you have mixed up. With a familiar, high-fire clay, make a little bowl. Put the test of the reclaim material in the bowl and fire it first to a bisque temperature. If the reclaim test has the qualities of bisque-ware, consider testing it at a higher temperature. Maybe cone one. Then cone six. (We usually fire ours to cone one and we use a cone six clay for reclaim).
After you have tested for your end firing temperature, start preparing the reclaim to press into the molds. Wedge, wedge, wedge... Overfill the mold. Press the reclaim into the mold with the heal of your hand. Remove the excess by sliding a wire tool across the top, through the uneven reclaim. Flip the mold over and pop the brick out, repeat. After several, your mold may become wet and not release. Either pause in the process to let the mold dry or make more molds.
As you quickly fill the table with your new patio bricks, make sure to turn them up on their long-narrow side to dry. This will enable more even drying and help to prevent the bricks from cracking in this process. We also drill 6 holes, evenly spaced into the broad backside of each brick (about one inch deep). This helps with even drying.
Congratulations! At this point your glaze waste has been recycled into a usable material and formed into an object you can use to decorate your studio and home. All you have left to do is fire the bricks. We fire our bricks one time to cone 1 as we are reclaiming cone 6 glazes and clay. This will vary depending on the clay and glaze you reclaim. Make sure you gather test results before firing bricks in your kiln!
Once your bricks are out of the kiln you can start decorating your garden beds and walkways around your home and studio. Maybe even find a place to store them, out of the way for now, with plans to do a big project.
Some project ideas that we are starting out with are simple walkway defining rows, stepping stones, doorstops and decorated raised garden beds. Our big project being is a new patio around our fire pit hang out. We would love to see what designs and uses you come up with as well, so post photos and send us a link or tag us in the photo. Have fun and be proud of being green!
Follow Us @ratcitystudios on Instagram and FB
#lovewhatyoudo #reclaimbricks


